
Start C Quickly
To start C quickly, you need to have an IDE which stands for Integrated Development Environment. An IDE includes a text editor and a compiler. You can find a bunch of IDEs such as Visual Studio, Eclipse, and Code::Blocks. In this course, we use Code::Blocks to write and test our code.
Install the IDE
To install Code::Blocks, head over to https://www.codeblocks.org and download the mingw-setup.exe file.
Let’s run the first code
After finishing the installation process, open Codeblocks and follow these instructions:
- Go to the Start here page and click on create a new project.
- Select the Console application and hit the go button.
- Select C, not C++.
- Set a name for the project and choose the destination folder.
- Choose GNU GCC as a compiler and hit the finish button.
- Now, from the left bar, open project name > Sources > main.c file.
Write the following C code as “main.c” and save it:
#include <stdio.h>

int main(){
    printf("Hello World!\n");
    return 0;
}
In Codeblocks, it should look like this:
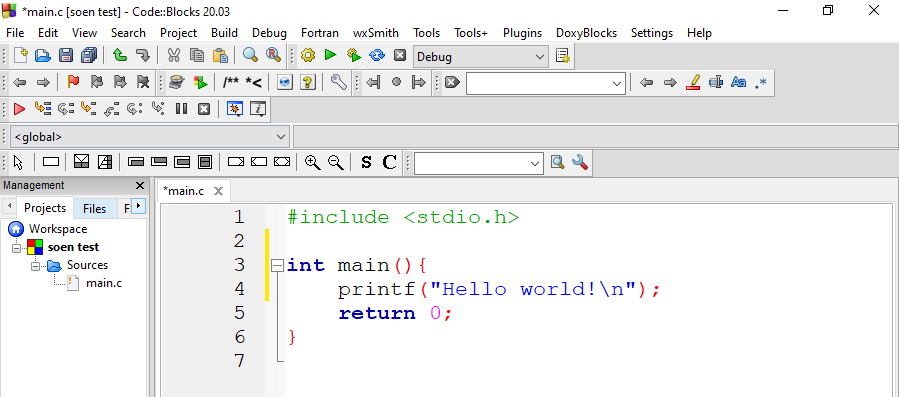
Don’t worry if you can’t understand the code. We will explain it in the following. Now, go to Build > Build and Run to run and execute the program. The result will look something like this:
Hello world!

Process returned 0 (0x0)   execution time : 0.050 s
Press any key to continue.
You have successfully written your first C code. Now, it’s time to explain the code.
Code explanation
#include <stdio.h> is a header file that includes the standard input and output library in the current project so that we can use its functions. In this example printf() is a function from this library. The semicolon at the end of the line shows that the statement is ended.
The main() is a function you see in every C project. This function is mandatory in every C project, and other parts of the program are called here. Note that the body of each function must be inside curly brackets {}.
The printf() is a function that allows us to print text onto the screen. Moreover, this function lets us print a new line with “\n.”
The final part is the “return 0” that ends the operation of the main function.
Practice: Consider the example of this lesson and change it to show your first and last name on the screen.